Statements
Statements are a great feature within Lightyear to help reconcile your outstanding Bills and keep a track of reconciled supplier statements.
How to file a statement

Searching for a filed statement


Reconciling Statements

Trashing Statement
How to file a statement
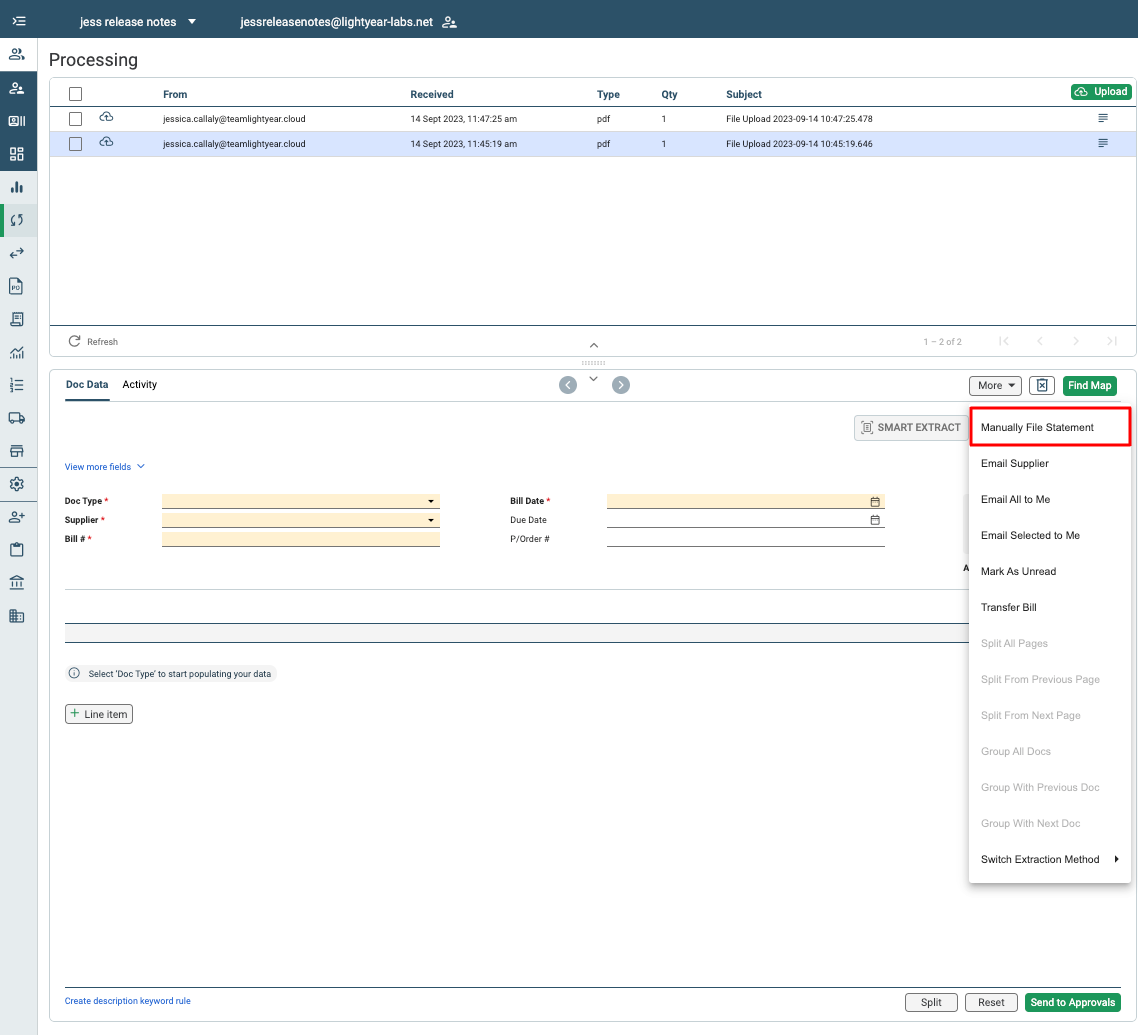
Statements can be filed to Statements Tab from the Processing Tab. Select the statement, and click More > Manually File Statement.
You'll be asked for the following info.
All fields are mandatory
- Supplier
- Statement date
- Bill date range
Once these are filled out, the statement will be stored in your Statements Tab
Searching for a filed statement
Anything that's marked as a statement will be stored in the Statements Tab, so this is where we'll need to go to view them.
Results are displayed in the following format within the 3 panel layout :
Panel 1 - The statements that have been returned in the search parameters
Panel 2 - Default view will display the summary information of all Bills with the selected statements date range. Note: Panel 3 will display the statement image by default. If user selects a Bill in panel 2, the image will display the selected Bill, and the data in panel 2 will display the selected Bills details. To return to the Statement view, click 'Statement Detail' in the panel 2 sub-menu
You can pivot between Search, Statement Detail, Statement Activity, Bill Detail & Bill Activity within the sub-menu of panel 2.
Reconciling Statements
To mark a statement as reconciled, tick the 'is reconciled' tick box in panel 2 under statement detail. This will then flag as reconciled and will be denoted with a green thumbs up in panel 1 (see image below)
Trashing Statement
You can trash a statement by clicking the Trash icon in panel 2. You can search for trashed statements by clicking the 'include trash' tick box when searching.
Related Articles
Statements - How to Reconcile
Automatic Supplier Statement Feature allowing you to file & automatically reconcile your supplier statements, making reconciliation a breeze. What's more, if there are any missing documents on your statement, you can automatically email your supplier ...Emailing your Suppliers
You can email your suppliers directly from the Approvals tab. You may want to do this in the case of a discrepancy or mistake on an invoice you've received. To do this, head into the Approvals tab, select a bill and click the More button, then Email ...Approvals Tab
Watch this video on the Approvals tab: The Approvals Tab is where the approvals process starts. Lightyear has a 3 panel layout, and we will always refer to them as panel 1, 2 and 3 as below. Panel 1 shows a list of the bills that are waiting to be ...Bulk Supplier Upload
Similar to how the Product List, GL Code, Supplier Cards, etc. bulk upload works, users can use a CSV to quickly create all Suppliers within Lightyear. The CSV needs to follow a specified layout, as some columns are required, and others need to ...Step 8: Tell your Suppliers what to do
FOR YOUR TEAM Once your staff have been brought up to speed to the changes re Lightyear, you should now start asking your suppliers to email your bills to your xxxxx@lightyear.cloud account. No-one particularly likes change, but from the very outset ...