Inventory Tab
Lightyear allows you to send data to external Inventory, Point of Sale or ERP systems (or if you wanted, a simple spreadsheet). It does this by adding an inventory tab and providing you with the “Add to Inventory” button in Panel 2.
The inventory tab will not be visible when you first setup your Lightyear account. You can choose to turn inventory on and off at any time.
The Inventory tab in Lightyear is designed to allow you to send data from bills to an inventory system that is not within your accounting software.
If you would like to export your stock and numerical data across to your inventory software, Lightyear can help. With Lightyear, you can log and record each product code that comes in on invoices from suppliers. When the invoice is mapped, the data for your products will automatically record and become available for export, making your inventory tracking super easy to track.
Enabling the Inventory Tab
Click on Company Settings tab:
You will see the general tab open up on your screen:
Scroll down until you find the option for "Inventory/POV" then select YES to enable to inventory feature:
A new icon will appear to the left on your icon ribbon under settings:

Please Note: a list of partnered software can be found
here.
Inventory Defaults
Now that you have enabled the use of inventory exports, we can set up our default settings and how we want Lightyear to treat our inventory data.
Selecting your Inventory Software
Click on the inventory icon that can be found under the settings icon to the left of your screen:
Select your Inventory Software from the drop down menu:
Once selected, options will appear.
Set your Default Product Units
Once you have selected your Inventory Software you will need to set a Default Product Unit.
Click on Inventory/POS Settings
If the majority of your stock arrives in Cases then choose this option.
Otherwise select Units (which will always default your items to a quantity of 1).
Click on the drop down menu:
Select your preferred unit type:
Unit – Item that is sold as that item whole (e.g. 1 Duff beer bottle = 1 Unit)
Cases – Item that is made up of multiple units (e.g. A case of 24 Duff beers = Case of 24)

By design this can be changed at any time as different suppliers invoice stock in different units.
Import your Suppliers from your Inventory Software
This is a mandatory step because it makes your import routine easier, you're adding a supplier name to identify each exported document in different ways for different systems:
221219Duff_Brewery_Pty_Ltd.csv
Where the first 6 numbers are the delivery date DDMMYY and the next string is the name of the supplier as the inventory software knows it to be. The “.CSV” is the file type.
Navigate to Settings > Inventory Settings > Supplier Cards > Edit
On the top right, click the 'Upload CSV File' button.
Locate the CSV file you exported from your Inventory Software, select this and click 'Open' in the dialog box.
Lightyear will ask you ' Does the uploaded file contain a header row?'
If your CSV file has a header (normally containing a label) in row 1 then click Yes. If the CSV file does not, then click No. At this point, the following modal will be displayed:
Clicking the dropdowns will allow you to select which column on your .csv is applicable to each Lightyear Field. Note that if your upload did not contain headers, it will just display the column letters. Simply select the correct columns and hit Confirm to finish your upload.
Associate your 'Inventory Supplier'
On the left hand ribbon, click Suppliers:
Select each supplier you would like to associate with Inventory and click the edit icon

on the far right.
Assign an ‘Inventory Supplier’ from the relevant drop down list (listed in this drop down are the suppliers you exported and uploaded).
Select your inventory supplier from the dropdown:
Once chosen, click the save button to the bottom right.
Each updated inventory supplier that you set against your supplier cards will show in the supplier screen, in the "Inventory Supplier" column.
You are now ready to export purchases to your Inventory Software.
Sending bill data to the Inventory tab
Lightyear allows you to send line item data external systems via the Inventory tab.
In order for a bill to be sent to the inventory tab, Lightyear needs to have extracted product codes , quantity and unit prices (via a 'line item' map) .

Service bills cannot be sent to Inventory, if there are no Product Codes or Quantities.
If Lightyear has only extracted a description from each row, the Doc type is considered 'Bill - Service' . Panel 2 will look something like the below and the Inventory button to the left of the Approve button will be deactivated.
Line Item Bills - CAN be sent to Inventory
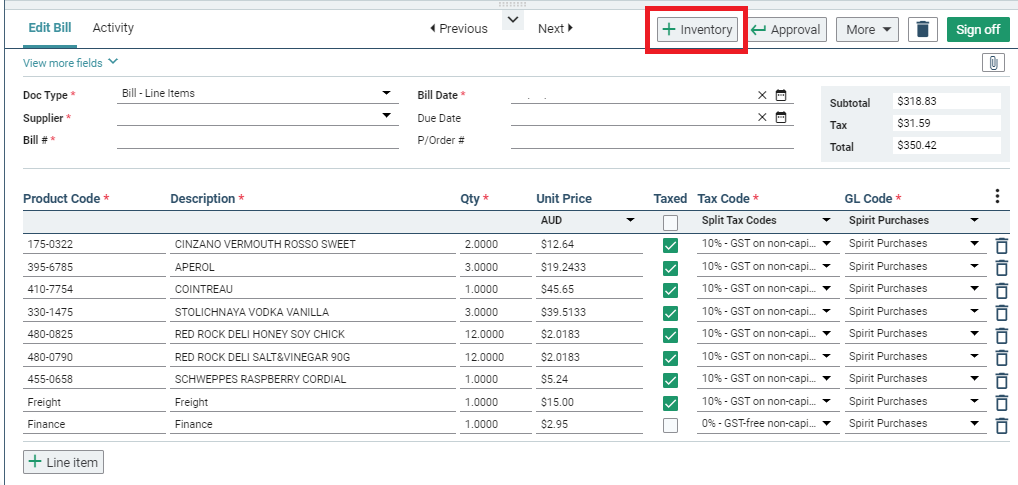
If Lightyear is able to extract product code, quantity and unit price, the '+ Inventory' button will be available for you in Panel 2, Review Tab and Archive. Lightyear refers to this type of doc as a 'Bill - Line Items'.
Bills sent to Inventory
Once a bill has been added to Inventory, navigate to the Inventory Tab. you will notice a new icon next to that bill . This icon confirms that the bill has been sent to Inventory.
Managing Bill Data in the Inventory Tab
The Inventory tab will appear as follows (or similar) once bill quantities have been added:
Panel 1 (in Blue) details the bills that are awaiting export. Panel 2 (in Red) presents the detail of the selected bill.
Lightyear needs to be told (once!) if:
(a) the product is either a unit or a case.
(b) if a case, how many units are inside said case (Case of 24 x Cola Bottles etc).
(c) your external software knows the product by a different code (e.g. a SKU, or a PLU).
(d) your external system is happy to receive the product data using the supplier product code (extracted from the bill).

Lightyear cannot export without being taught this information.
Displaying 'Cases' or 'Units' as default is a preference that can be set in the Inventory Settings page on the left ribbon.
It should be noted that you cannot adjust the extracted quantity on a row that is to be exported (be design). If quantity is incorrect the bill should be removed from inventory and the extracted bill details overwritten in the Approvals or Review Tab... then 'Add to Inventory' once more.
Once exported, a bill cannot be edited. Bills should not be exported to your external software before a user has checked the quantities are correct.
Finally, you can select which lines you want to export by checking the green box to the left of the line item.
Removing an invoice from the Inventory Tab
You can remove an invoice data from the Inventory tab if you do not want to export that invoices data by clicking the negative inventory button.
If you need to edit any of the Product information (e.g. Case Qty, POS Code, Unit Type) against any of the lines in the Inventory tab, and want this saved for the future, you can do so by clicking the green pencil icon

to the right of each line.
This will open the Edit Product modal and allow you to make changes to any of the fields. Once you click Update, the changes will be saved against this document.
Exporting data from the Inventory tab
Once you are happy with the data that is in the Inventory tab, click the Export to File button. The file that Lightyear creates for you will depend on the POS system you have chosen in the Admin tab. Please refer to the specific details relating to your POS system for more information.
You'll see this symbol next to a bill that has been exported to Inventory but is still waiting to be exported to your Accounting Software.
Can I re-export my batch of purchases if I like?
You sure can, just head to 'Archive & Reporting':
 How to re-export an inventory batch