OrderMate
![]()
This guide has been prepared by OrderMate. For further clarification please call your OrderMate Support 1300 667 067.
OrderMate has a very intuitive import routine that handles multiple bills from multiple suppliers at once, create new suppliers in OrderMate upon import - no need to have the Supplier in OrderMate prior to import and create new items in OrderMate upon import - no need to have the products already in OrderMate prior to import.

Set-up in Lightyear
Once you have completed the steps above you now need to export a list of your suppliers from OrderMate to then upload to Lightyear. This is a mandatory step because it makes your import routine easier, OrderMate will match the supplier name.
Click on Supplier Cards > Setup
Click on Browse, find the .csv file you saved with the list of Supplier Names and follow the prompts. After import you should then have a list showing Supplier Names.
Define your Default Unit Type
Set Mandatory Export Fields
- Case Qty
- Unit Type
- POS Code
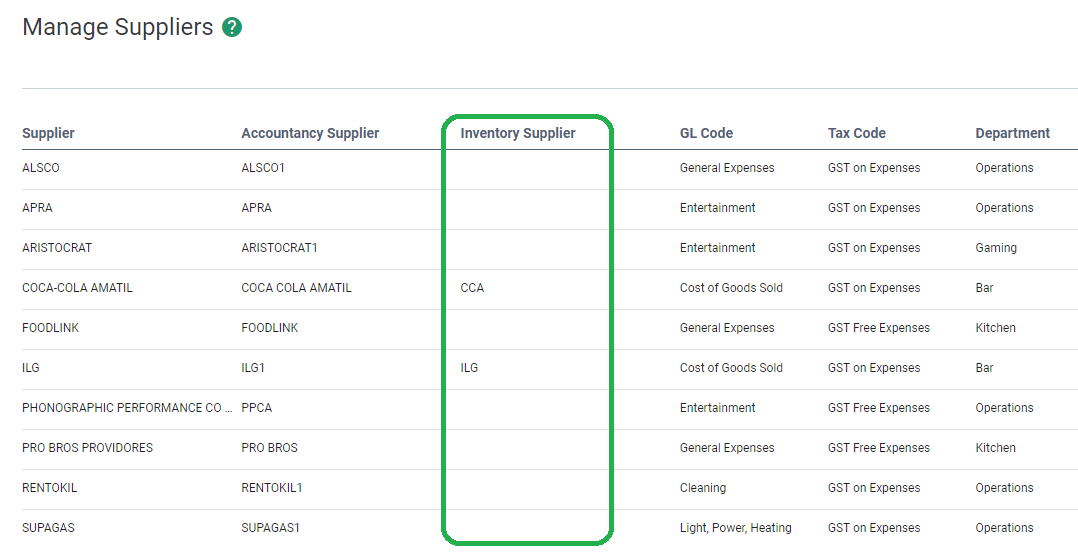
Associate your OrderMate Suppliers with your Lightyear Suppliers
Set-up in OrderMate/Officemate
First, you will need to log into OfficeMate as an administrator user. You should then navigate to Setup > Configuration, Invoice Integration.
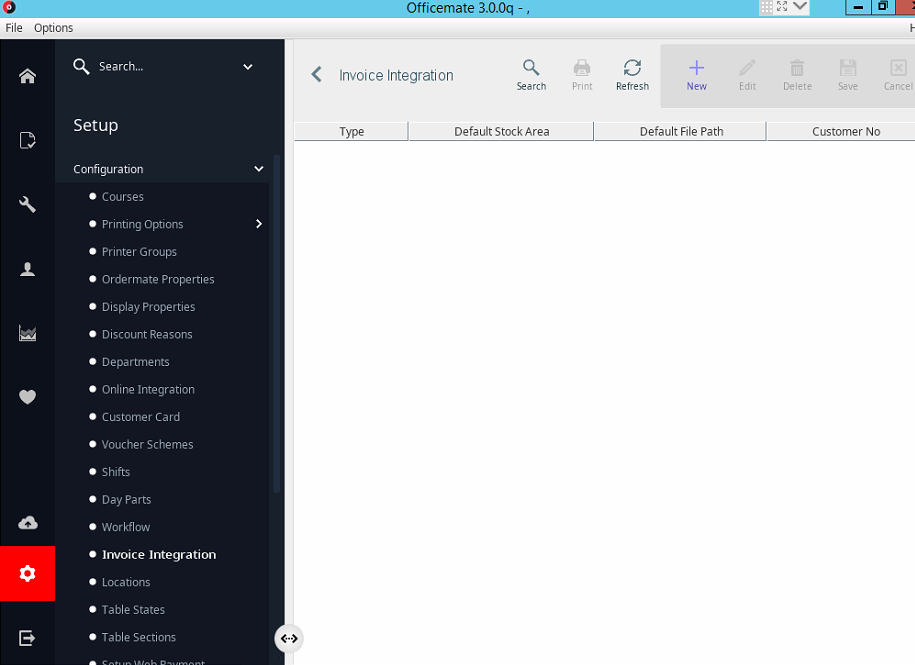
Clink “New” to add a new invoice integration.

Select “Lightyear” as the invoice type.

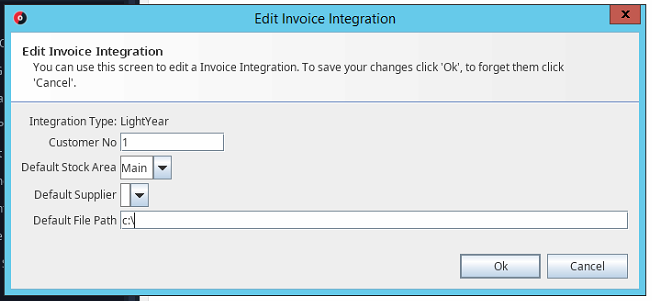
You will now be asked to configure some different options for the integration. These are simply defaults:
- When using Lightyear, the Customer Number and Supplier are set by the invoice that is imported.
- The Default Stock Area should be set to your main stock area that you bring invoiced into.
- The Default File Path should be set to whatever location you commonly store your invoice files in.
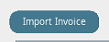
Click Import Invoice from the toolbar.
You will then be prompted to select the file you wish to import. You should browse to the appropriate csv file saved from Lightyear.
- OrderMate will now begin to scan through the import file and attempt to match stock items based on the supplier name and product codes.
- Suppliers that have matching names will be matched automatically. If the name of the supplier in OrderMate varies from Lightyear, you will be prompted to select the supplier it refers to, or alternatively to add a new supplier in OrderMate.
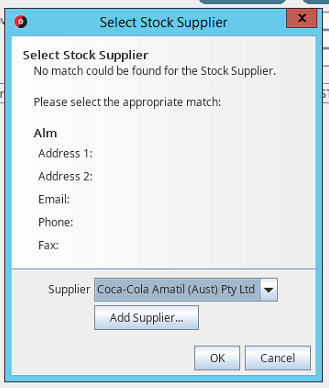
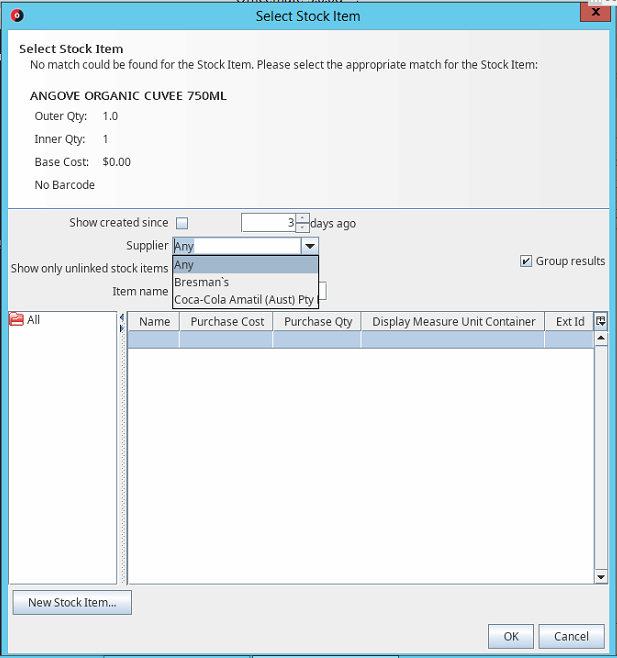
If the stock item can't be matched to an existing one based on product codes, you will be prompted to match each product, or alternatively add a new one.
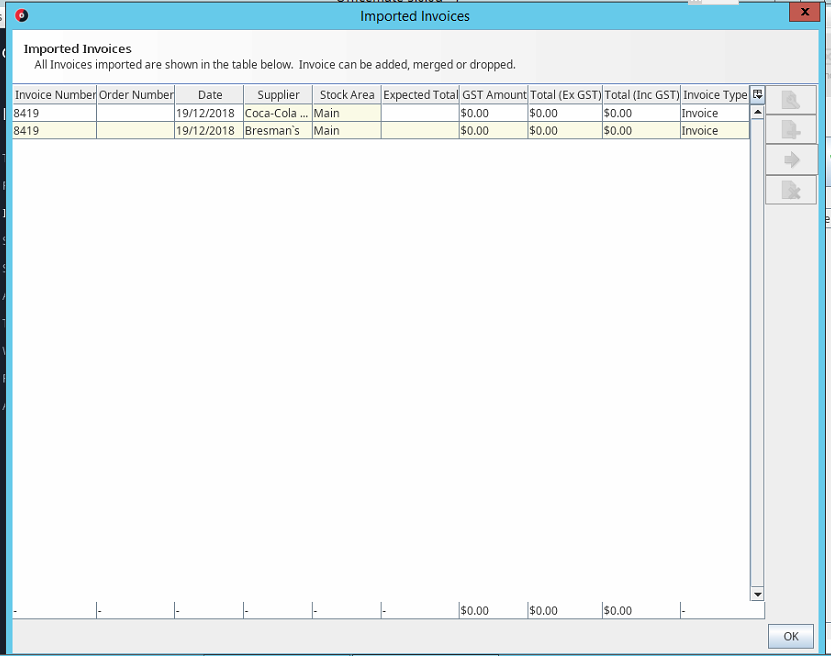
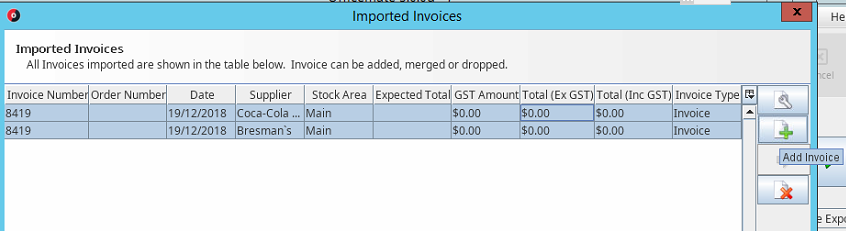
Once all products are matched, you will be presented with a preview of invoices to be imported. Here, you may edit invoices and check over them.
Click the Plus icon to import the selected invoices.
Related Articles
How to Export to OrderMate using the 'Other' Export Format
First, you need to switch on the Inventory export feature, to learn how to do so, click here. Then go to 'Inventory Settings' section of the app, select 'Other' from the Inventory / POS Software dropdown. Now, click Edit next to Export Mappings. Use ...Choosing "Other" as your Inventory Software
While Lightyear supports many different types of inventory software through a predefined export, you may be using one that isn't yet formally supported. Well, good news! If your inventory software supports either a .csv or .txt upload, you can now ...How to Import Inventory Bills into H&L Sysnet
How to Import Inventory Bills into H&L Sysnet On your Sysnet device's desktop, double-click H&L's app called 'Lightyear Invoice Importer' Enter your H&L credentials Drag and Drop the downloaded CSV file from Lightyear (this will be in your chosen ...SwiftPOS
With over 23 years of experience as a POS Software Solutions Provider, SwiftPOS is world renowned for its total Point of Sale solution. Lightyear is able to provide an export file to SwiftPOS that allows for easy Inventory updates. For more ...Impos
Impos’ POS software is designed to suit a range of hospitality venues from cafes and restaurants to multi-site restaurant groups and national service organisations. Impos have been serving the hospitality industry for over 13 years with the fastest ...