Lightyear Panels: Explained
When reading through our Knowledge Base articles or if you’re speaking to our Support Team, you may see us referring to Panels within Lightyear.
This article will explain what the Panels are and what information each panel holds.
Layout
Every tab within Processing, Approvals and Purchase Orders will generally follow a layout similar to this.
Panel 1:
Panel 1 is the top left panel on your screen. This area allows you to click between each tab i.e. in Approvals you will have different tabs for Approvals, Review, Signed Off, Inventory, Disputed (depending on the settings you have enabled in your account).
Below these tabs are the column headers which allow you to sort the documents within Panel 1 in ascending or descending order. To the right of these headers you will see a filter icon, to narrow down the results of documents in Panel 1.
To the far right of the columns is 3 vertical dots  . Clicking this opens a mini menu that allows for customisation of the column headers.
Some of these columns are required, and cannot be removed - such as Supplier and Bill Date. Others, like those in the screenshot, can be added or removed as needed.
Please Note: this will only customise the view on your personal account, and will not affect the view other users see in your Lightyear account.
In the main area of Panel 1 is the documents (Invoices, Purchase Orders, Receipts). Clicking on each document will display within Panel 2, but more on that soon!
Finally at the bottom of Panel 1 is a Refresh button  which will update the documents you see in Panel 1, which is useful if other users are in the Lightyear account, moving documents around at the same time.
To the right you will see some small pieces of information and a couple extra buttons.
The very last thing within Panel 1 is the arrows to navigate between Pages.  Starting from left to right, the first button will send you back to the First Page. The following button will go back to the Previous Page, the other to the Next Page. The final button on the right will send you to the Last Page. If these are greyed out, you only have one page of documents to view, therefore there are no pages to click between.
Panel 2:
Panel 2 is located directly below Panel 1. As mentioned above, if you click on a document in Panel 1, it will be displayed with more detail within Panel 2.
The information displayed in Panel 2 varies, depending on if you’re looking at the Invoice side of Lightyear, or the Purchase Order side. To keep this simple, this section will focus on the Invoice side.
Starting along the top, to the left there are 2 tabs to click into. Users are automatically defaulted into the Edit Bill tab on first click, which displays the bulk of information which has been extracted by us. Activity has 3 further sub-tabs; Notes, Activity, Email.
Notes: Allows you to leave comments for other users in your Lightyear account. Similar to any other application, you can use ‘@’ to mention another user and send them a Notification.
Activity: Contains the full audit trail and history the document has gone through within Lightyear, along with information on which User has actioned the document.
Email: If a document has been emailed into Lightyear, this contains the sender email, timestamp and body of the email which has been sent.
Back in the Edit Bill tab, to the top right, there are a couple buttons which are visible to users. The buttons you see will depend on where the document is currently located, and also the User Permissions you hold.
More contains extra actions that can be performed on a document (see screenshot below).
Most of these are self explanatory, Dispute will move the document into the Disputed Tab, Re-Apply Map will reapply the map, and so on. If you have multiple Lightyear Accounts, and a document has been uploaded into the wrong account by mistake, Transfer Bill will allow you to move the document to another Lightyear account.
To the right of More is a trash icon  , clicking this will delete the invoice. Don’t worry if you click it by accident, it can be retrieved from the Archive!
In this screenshot, the next button is Sign Off, depending on your workflow set up, this could say Review, if you are in Approvals. To sign off a document, all required (*) fields will need to be populated.
Below this button is a paperclip icon  which allows you to add extra attachments to documents, i.e. supporting documents on invoices, or receipts on expense claims.
Next up is what we refer to as the Header information of the document. This includes:
Doc Type(*): This is usually the type of map we’ve created for the document i.e. Line Item will give line item information including Product Codes and Quantities, whereas a Service will only provide a Description. Users are able to change this if they would prefer to add/remove information manually.
Supplier(*): The supplier attached to the map used. This can also be manually changed and selected from the dropdown.
Bill #(*): The Bill Number extracted from the document.
Bill Date(*): The Bill Date extracted from the document.
Due Date(*): The Due Date extracted from the document, or taken from the Credit Terms in your Suppliers. This is a required field for Invoices, but not Credit Notes.
P/Order #: A Purchase Order number, either extracted from the document or added in manually if not populated on the document.
Subtotal: The net amount calculated based on the line items.
Tax: The tax calculated based on the line items, and which lines are taxed.
Total: The gross amount, calculated based on net and tax amounts.
Amounts are: This dropdown allows you to change the value to show the amounts on the line as Tax Exclusive, Tax Inclusive or No Tax.
Depending on the Accountancy Software, you may see more or less fields than this.
Clicking the View More Fields button will present you with more fields, with extra information extracted from the invoice.
Delivery Date: The date of delivery of the items from the invoice. If this hasn't been mapped by us, it will default from the invoice date.
Shipping Date: The date the items on the invoice have been shipped.
Customer #: The number that your Supplier refers to you as.
Sort/BSB/Routing: Depending on where you are from, you will call this something different. Sort Code in the UK, BSB in Australia/New Zealand. This will be extracted from the document, if given.
IBAN: IBAN number extracted from the document, if given.
BIC: BIC/SWIFT Code extracted from the document, if given.
Order Date: The date the items on the invoice were ordered.
Misc Ref: A field for extra information to be extracted.
Vendor #: The number that your Supplier refers to themselves as.
Account No: Bank Account Number extracted from the document, if given.
Account Name: Bank Account Holder Name extracted from the document, if given.
BPAY Biller Code: Only available on Australian invoices
Bank details are apart of a larger feature called Bank Details Checker, for further information on this, click here!
The main body of Panel 2 contains the Line Item information or the invoice. Depending on the map type selected and your Accountancy Software settings, you may see more or less columns.
From left to right you will see Product Code, Description, Qty, Unit Price, Amount, Tax Amount, Taxed, all of which are self explanatory.
Following from this is the Tax Code column, which allows you to enter a tax code to use when exporting to your Accountancy Software. If you have any Supplier Defaults or a Company Default set, this will automatically populate for you.
GL Code is next - similar to Tax Code, if you have any automation rules set up on Suppliers, these will automatically populate on each line.
If your Lightyear Account has Purchase Orders enabled, you will see a column for Match Status and Closed. For more information on these, please go to our Purchase Orders article.
Each line has a trash icon, allowing you to remove individual lines  where necessary.
Scrolling down to the bottom, you will see a button  to manually add in an extra line.
The final 2 buttons in Panel 2 are Reset  and Save
  . Reset will reset any unsaved changes to the document, and Save will save the most recent edits and changes on the document.
Panel 3:
The final panel is located to the right of both Panel 1 and 2. If you are in Purchase Orders, this isn’t visible by default, you will need to click the < button on the right hand side of your screen to expand the panel.
Panel 3 is the easiest to understand as its purpose is to display the document which has been uploaded to Lightyear, making it easy to compare the data in Panel 2 to the actual document.
We have some buttons in Panel 3 which can be useful:
Toggle
If you prefer to have Lightyear in a specific view within Lightyear, you can use our Toggle to change which Panels you can see on screen.
In the top right of Lightyear, you will see the Toggle Switch 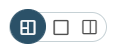 which allows you to change your Lightyear view.
The first option will display the default 3 Panel view:
The middle option will display a list view of Panel 1 only:
While in this option, the CTAs (Approve, More, Add to Inventory, etc.) will move to the top right of the screen, beside the Toggle icons. This will allow you to individually action your documents while in the list view without needing to click into a different panel view.
The last option will display Panel 2 and Panel 3 only, giving you a clearer display of your bill details and the bill document:
Here, the icons you previously saw in Panel 1 (Approval Tasks, Inventory, Duplicates, etc.) will move into Panel 2, allowing you to view specific information previously only held in Panel 1.
Check out our
to stay up to date
Related Articles
How do I change my Company name or Lightyear email address?
Has your company name changed and you need to update your details in Lightyear? That's not a problem. You can change your 'Company Name' and/or 'Trading Name' via the Company Profile section. Navigate to the top right of your screen, you'll see your ...How does Lightyear Data Extraction work?
Data Extraction Explained Lightyear uses world class data extraction technology to minimise your workload. We strip all of the data, line by line, from your bills, credit notes and statements so you no longer have to spend long hours manually ...Lightyear Incident Report - February 2023
Incident Report: 15/02/23 Resolved: This incident has been resolved by Netsuite. No data was lost or breached in the process 15th February 2023 16:30 GMT Monitoring: We are currently monitoring reports from Netsuite users of problems with ...Lightyear Incident Report - April 2022
Incident Report: 6th April 2022 Resolved: This incident has been resolved. No data was lost or breached in the process. 6th April 2022 19:00 AEST Investigating: We are currently investigating reports of speed issues and general loading of data. All ...What Gets Redirected From Lightyear?
Where to add a redirect? If your Lightyear account receives an email that does not contain an invoice, we will forward the email to this address so that you don't lose anything. It's best to set this as an email account that you check regularly, just ...